7 Tips to make your schematic look professional
There are some things which you only find in professional schematics. Here are the most important.
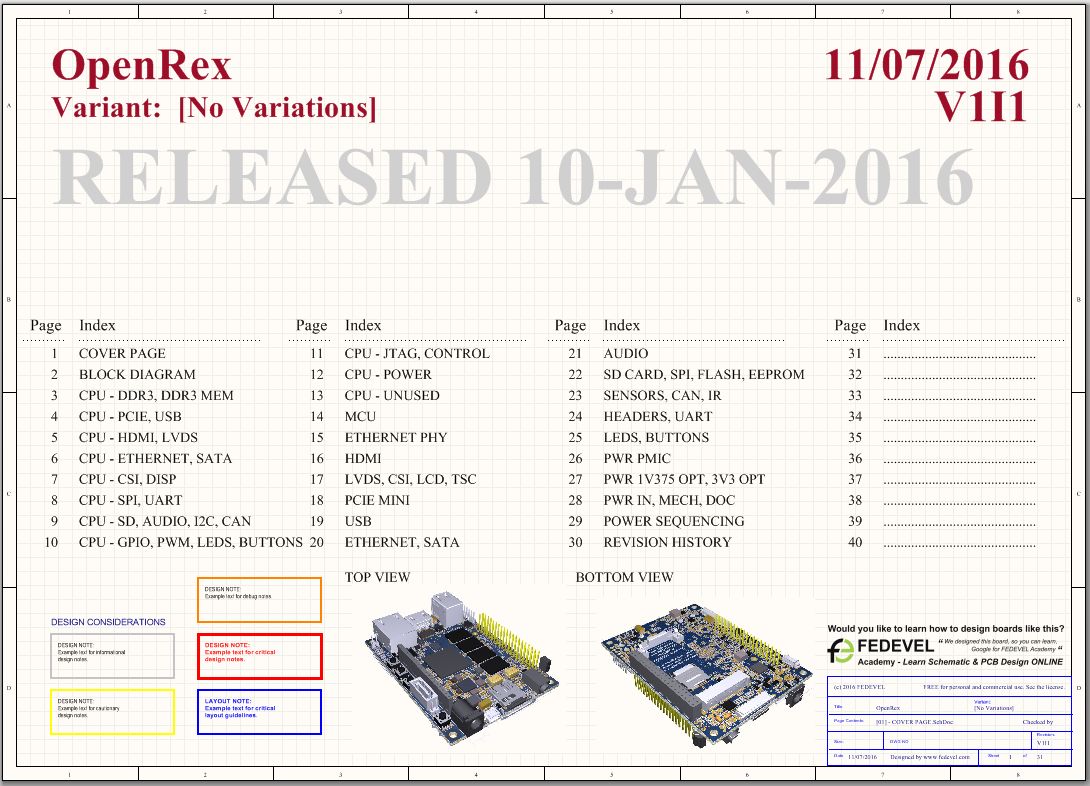
Tip 1: Always create a cover page with project name and list of pages
Why? This cover page is used by people who read your schematic. They will find it very useful. All professional schematics should include cover page with at least Project name and List of pages (including page numbers).Note: I have seen it many times. An engineer opens schematic, he/she looks at the cover page, find the page number what he/she is looking for (e.g. Ethernet) and jumps there. I do it too. If you do not include cover page it may be very time consuming to go through every page and look for the particular thing. The cover page is also extremely useful if you print out schematic and you can not use any “Search” tool.
Picture: A cover page example
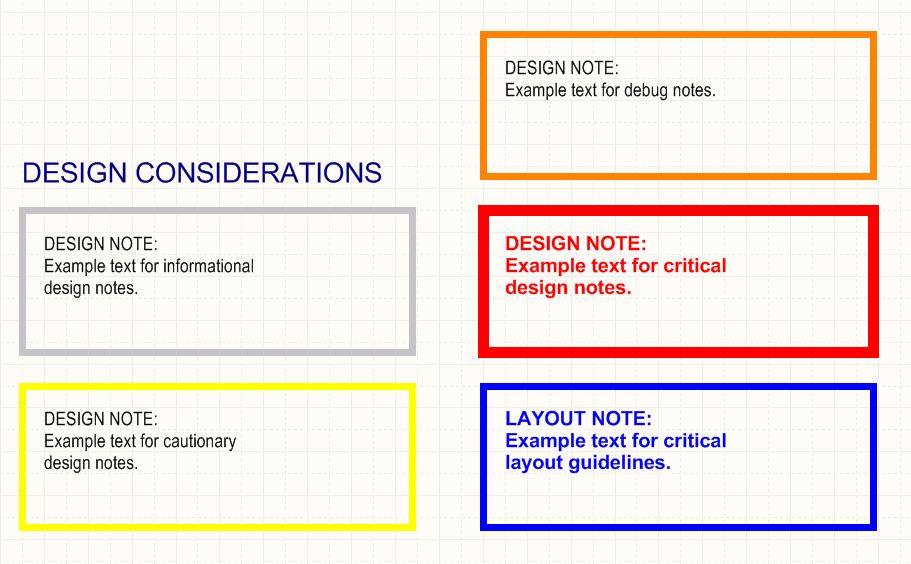
Tip 2: Add notes into your schematic
Why? When you are drawing a schematic, you study all documentation around particular pin or interface and if there is something important or useful, make a note, write it directly into your schematic. This way, you do not forget about it and you do not have to study hundreds of pages from documentation again – you know, that if there is something important, you have it in the schematic.Note: You may want to make notes about things such:
- Optional resistor (why it is there and when to fit it)
- Difference from reference design (so you are aware of all your changes, useful when you will be debugging the board)
- Software notes (if your hardware changes affect software and you have to rewrite it or add special support)
- Configuration (describe different configurations and what they do, so you do not need to go into datasheet and look for this information)
- add notes from design guides about specific signal or component (why it is there and why it is connected that way)
- add a note about how to do layout or placement for the particular signal or component
- add test and debug comments (if you need to test something before it goes to mass production)
- etc.
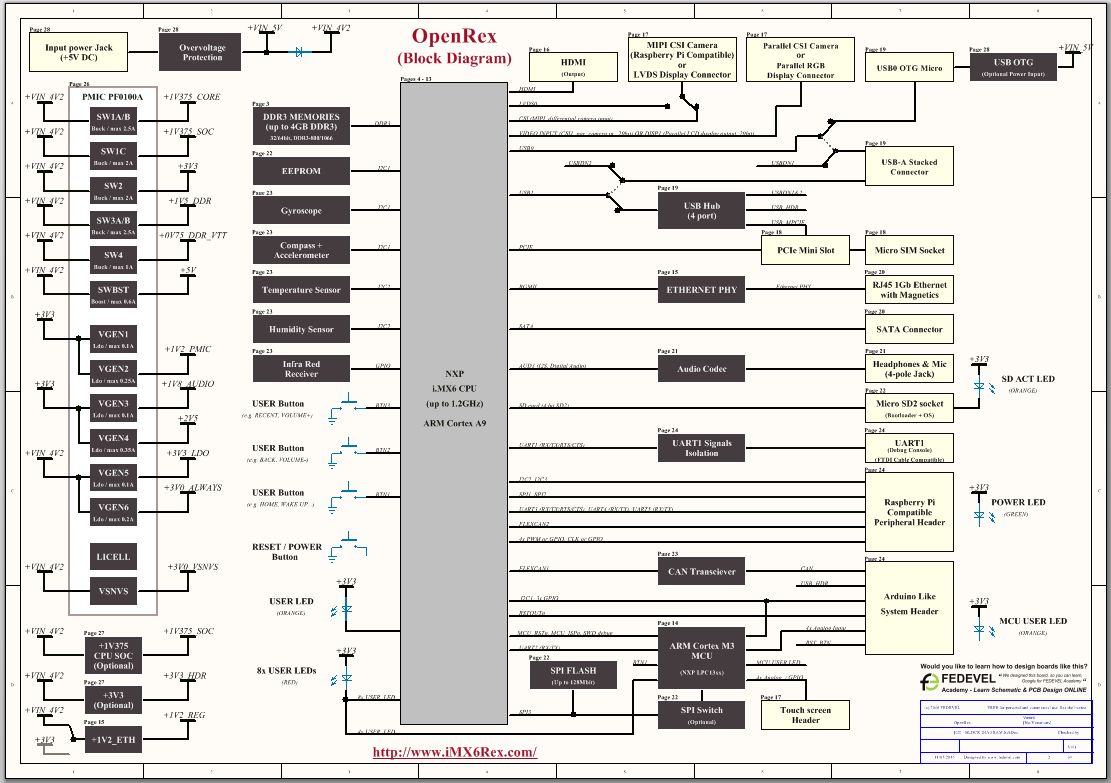
Tip 3: Always include a block diagram in your schematic
Why? Because this is extremely useful for people who read your schematic. Just looking at block diagram you can get pretty good idea what is the schematic about and what everything is there (what chips, what connectors and how they are connected together). This is one of the things which makes difference between an amateur and professional schematic. All professional schematics should have a block diagram page.Note: I have seen many schematics without block diagram (many people have sent me their schematics) and if they do not include block diagram, very often it is really time consuming just to figure out what it does.
Picture: Block diagram can be simple, it doesn’t have to look fancy, but must be easy to understand
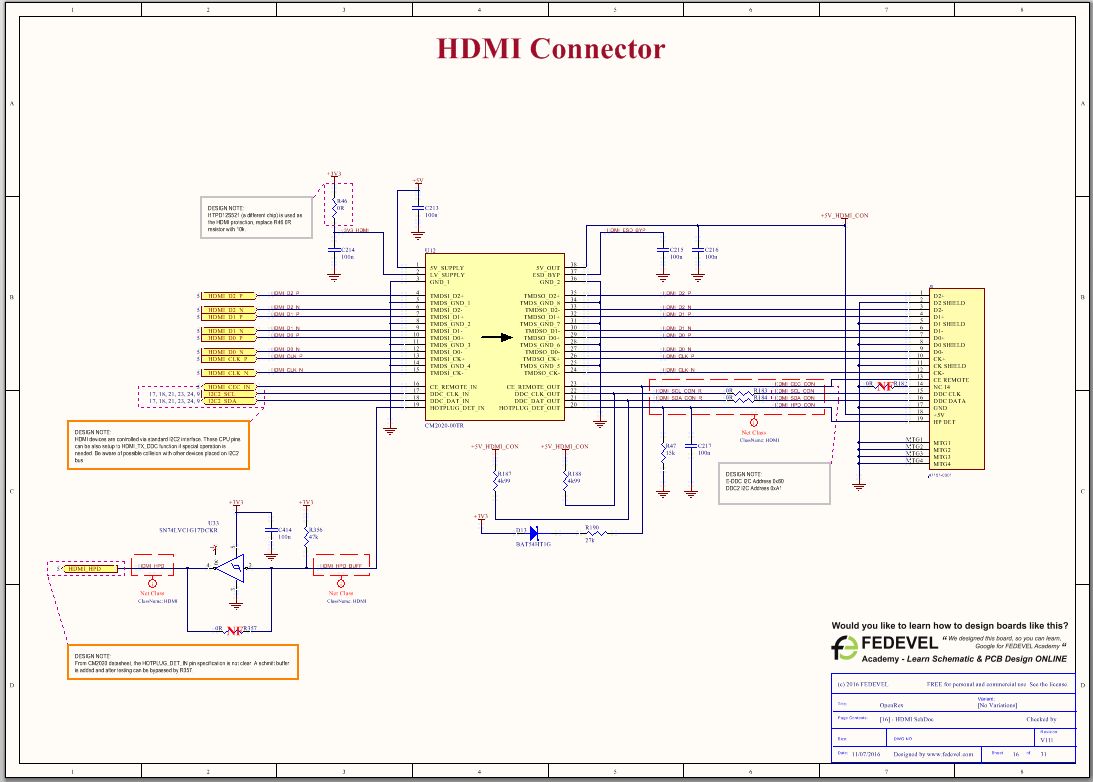
Tip 4: Put a big title on the top of each page
Why? You immediately see what is on the particular page. The page title should be similar to page name and should include all the interfaces and peripherals what are on that particular page.Note: If you do not include page title, you have to look at the peripherals, pins or nets, possibly you need to read the small text in your title block. Simply, just make it big and visible, so when you are listing through schematic, you immediately know what is on the particular page.
Picture: Example of a page with title on the top
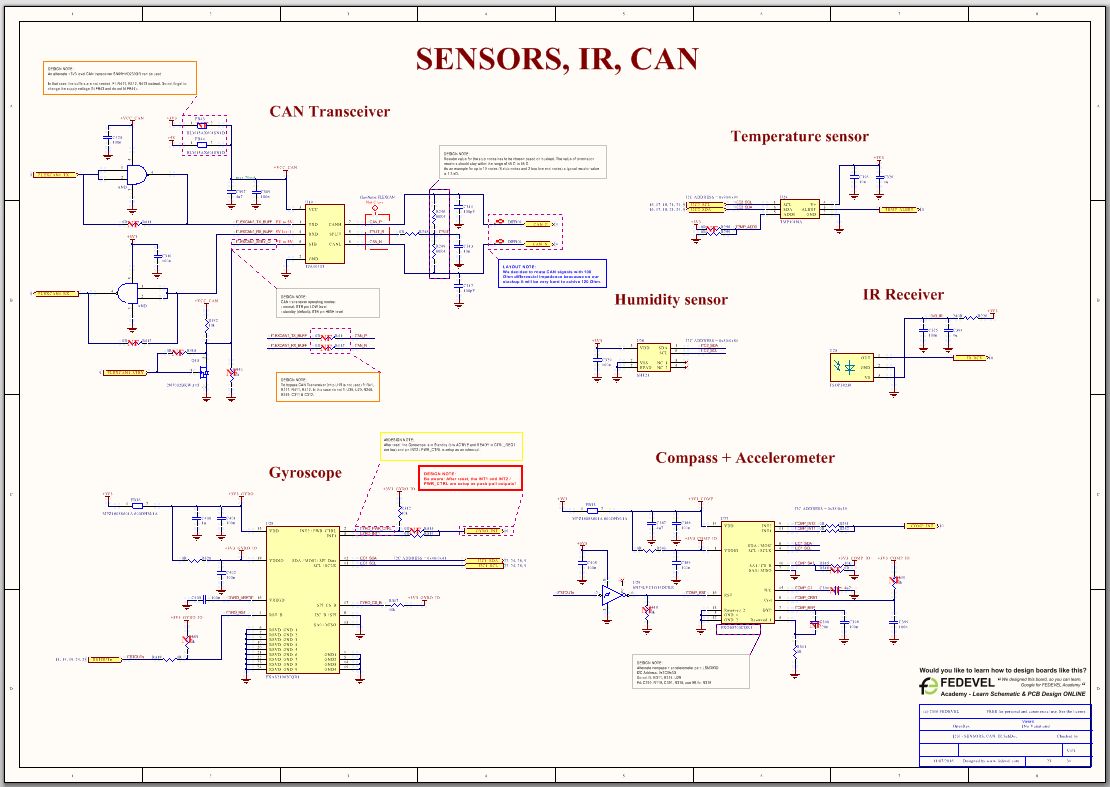
Tip 5: Put a small title for each chip / block / connector
Why? It’s so flustrating if you go through a schematic and you have to google for each chip to find out what it does. Simply, just put there a short description. You will help a lot of people and you will help also yourself, when after some time you will need to go back to your old projects. After a year even you will not remember what was the schematic about and if your boss ask you to do some changes, you will find all the descriptions and comments very useful.Note: It’s very simple to do, it doesn’t take a lot of time and it improves your schematic a lot. Compare by yourself:
Picture: An example of schematic with no description, what do you think, what it does?

Picture: An example of the same schematic page, but with title and descriptions. Can you see the difference?
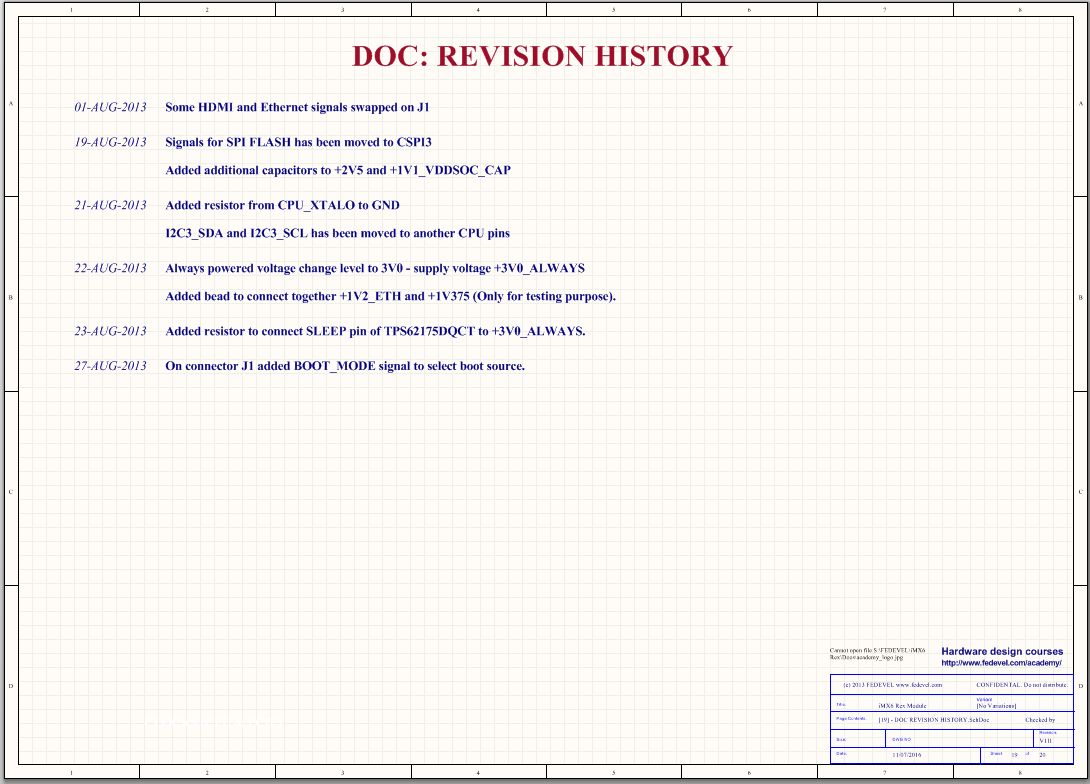
Tip 6: Always include Revision History schematic page
Why? Especially if your schematic is used by other engineers (for example if they use it as a reference schematic to design their own boards), it is important to include this page, so they immediately see what changes you have done between the revisions. Without history page, they would need to go through both schematics (theirs and yours), page by page, pin by pin and check what everything you have changed and to see if they need to update something.Note: This is something, what even I was lazy to do and sometimes it may not be very pleasant (because in some changes you will need to point out mistakes or errors), but it is a very important page. Just find time to fill it up, we are professionals.
Picture: An example of Revision history page
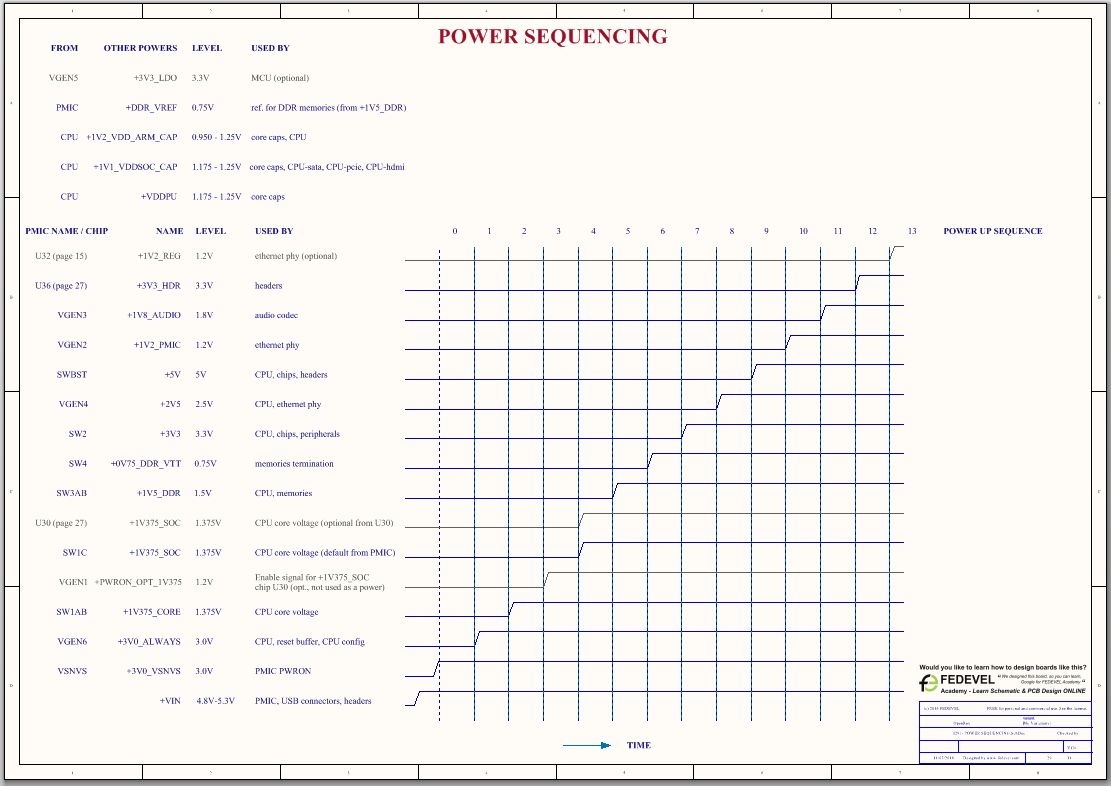
Tip 7: Add more non-schematic pages
Why? Sometimes your schematic needs more explanation. For example, you really may want to add a page with power sequencing or block diagram of power distribution. This will help you a lot during schematic design, schematic checking, debugging and it will also help other people to understand how the board works.Picture: Example of power sequencing page